If you skip degreasing kitchen cabinets before painting, your new finish will fail. Peeling, bubbling, and fisheye marks are not a paint problem—they are a prep problem.
To degrease kitchen cabinets for painting, wipe down all surfaces with a suitable degreaser such as Krud Kutter or a TSP substitute, rinse away all residue, let the cabinets dry fully, then sand and prime. Skipping or rushing any of these steps leads to poor paint adhesion and a finish that fails fast.
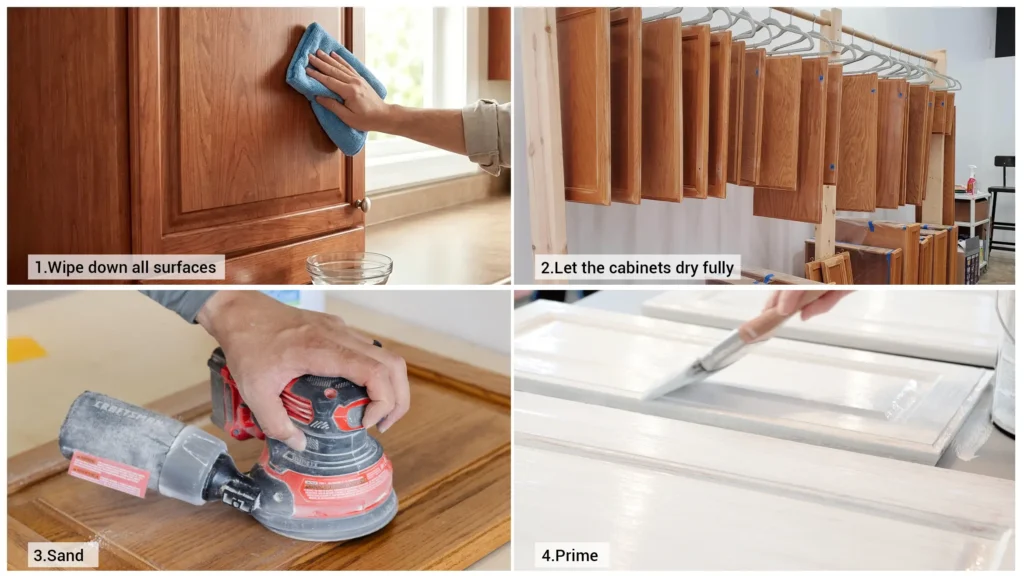
I have worked with cabinet production and full-project supply for years. One thing I see again and again is homeowners who spend money on good paint but skip proper degreasing. The finish looks fine for a few weeks, then it starts lifting around the handles. That failure starts before the first coat of paint is ever opened.
Why Do You Need to Degrease Kitchen Cabinets Before Painting?
Kitchen cabinets are not like a bedroom dresser. They live in the worst conditions in the house, and most of the damage you cannot even see.
Kitchen cabinets collect grease, steam, food splatter, and hand oils every single day. Most of that buildup is not visible. It forms a thin, clear film over the surface. That film prevents primer from bonding, which causes peeling, chipping, bubbling, and fisheye in the new finish.
The High-Risk Zones on Your Cabinets
These areas collect the most invisible grease and need extra attention before you paint:
| Zone | Why It’s a Problem |
|---|---|
| Around handles and knobs | Hand oils and wax transfer every time someone touches them |
| Cabinets next to the stove | Cooking grease and steam settle here daily |
| Bottom of upper cabinets | Rising steam and grease vapor coat the underside |
| Drawer edges and toe kicks | Often overlooked, these areas collect drips and splatter |
What Happens If You Skip Degreasing
Primer does not stick to grease. If you paint over a contaminated surface, you will see peeling, bubbling, chipping, or a fisheye texture where the paint pulls away from a greasy spot. Some areas stay tacky for weeks. The paint never fully cures because the bond to the surface was broken before it even started.
A lot of people believe sanding alone is enough. It is not. If you sand over grease, you grind the oil deeper into the surface. You are not removing the problem—you are hiding it. The grease is still there under your primer, and it will work its way through the finish over time. From my experience on factory floors and renovation projects, the thin, invisible oil film left by cooking residue and hand oils is more damaging to a final finish than visible dust or surface dirt. That is what most guides miss.
What Is the Best Degreaser for Kitchen Cabinets Before Painting?
There is no single best degreaser for all cabinets. The right choice depends on how much grease you have and what the cabinet surface is made of.
The best degreaser for kitchen cabinets before painting depends on the grease level and cabinet material. For light grease, Dawn dish soap and warm water works well. For moderate to heavy grease, Krud Kutter or a TSP substitute is more effective. Mineral spirits handles waxy or oily residue from old polish.
Source:
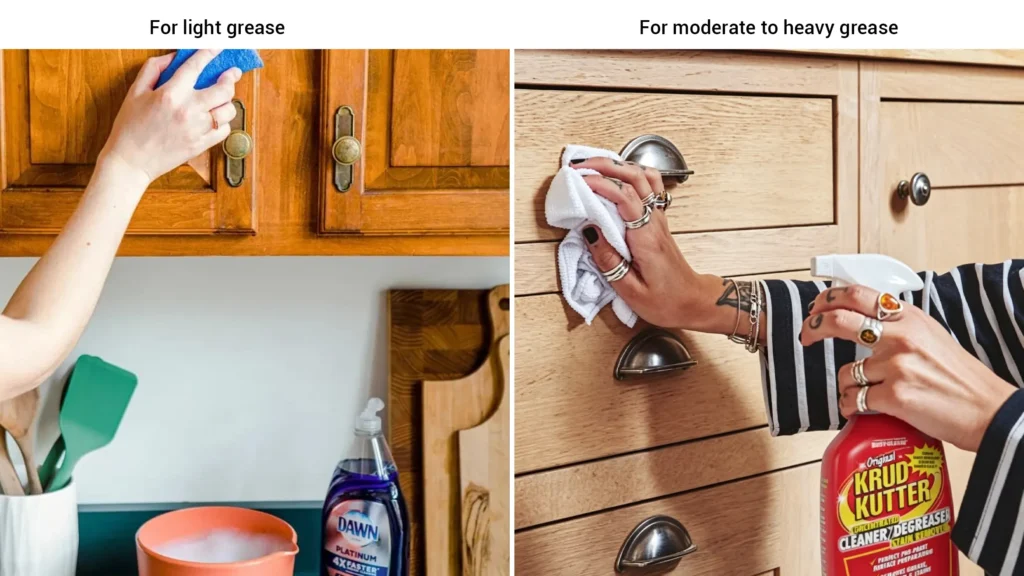
Degreaser Comparison for Cabinet Painting Prep
| Cleaner | Best For | Risk to Watch | Recommended? |
|---|---|---|---|
| Dawn dish soap + warm water | Light grease, everyday oil film | Must rinse fully—soap residue affects adhesion | Yes, as a first gentle pass |
| Krud Kutter | Moderate to heavy kitchen grease | Test in a hidden spot first; avoid soaking wood | Yes |
| TSP / TSP substitute | Old, heavily soiled cabinets | Must rinse completely—residue blocks primer | Use with caution |
| Zep degreaser | Stubborn grease buildup | High strength—check label for surface compatibility | Use with caution |
| Mineral spirits | Wax, old polish, oily residue | Flammable; requires ventilation | For professionals |
| Vinegar or natural cleaners | Very light surface cleaning only | Too weak for heavy grease; acid can affect some surfaces | Light use only |
| Murphy’s Oil Soap | Regular wood cleaning | Leaves conditioning residue—not ideal before painting | Not recommended for paint prep |
The real concern I hear from homeowners on forums and in consultations is not “which product is strongest.” It is “will the cleaner leave a residue that ruins my paint?” That is the right question. A strong degreaser that is not rinsed or wiped away properly causes the same bonding failure as the original grease. Always remove what you put on the surface before moving to the next step.
How Do You Degrease Kitchen Cabinets for Painting Step by Step?
Most paint failures on kitchen cabinets come from rushing or skipping steps in this process. Each step below has a specific reason it matters.
To degrease kitchen cabinets for painting, remove all hardware, dust the surfaces first, test your degreaser, clean from top to bottom, apply stronger cleaning only where grease is heavy, rinse or wipe away all residue, let everything dry fully, then sand and remove dust before priming.
Step 1: Remove Doors, Drawers, Hinges, and Hardware
Label every door and drawer with masking tape and a marker. Bag the hardware by location. This saves a lot of confusion when you put everything back.
Step 2: Dust and Vacuum Before Using Any Liquid
Run a dry cloth or vacuum over all surfaces before you apply any cleaner. If you apply liquid to a dusty surface, the dust and grease mix into a paste that is harder to remove and more likely to leave residue.
Step 3: Test the Degreaser in a Hidden Area
This step matters most for wood veneer, old painted surfaces, lacquer, PET film, and PVC-wrapped cabinets. These materials react differently to water and strong cleaners. Test before you commit to the full cabinet.
Step 4: Clean from Top to Bottom
Start with upper cabinets, move to door panels, then frames, drawer faces, and toe kicks. Work from the top down so drips land on surfaces you have not cleaned yet.
Step 5: Give Extra Attention to High-Grease Zones
The area next to the stove, around every handle, and the underside of upper cabinets needs more cleaning than the rest. These zones often need a second pass with a best kitchen cabinet degreaser before painting. A single wipe is usually not enough.
Step 6: Rinse or Wipe Away All Residue
If you used TSP or a strong degreaser, wipe the surface with clean water or a damp cloth. For soap-based cleaners, rinse the surface. Do not leave any cleaning product on the wood—residue is just as bad as grease when it comes to primer adhesion.
Step 7: Let Cabinets Dry Fully Before Sanding
Surface-dry is not the same as fully dry. If the wood feels cool or the edges look darker, moisture is still present. Give the cabinets enough time—often several hours or overnight in a humid environment.
Step 8: Sand After Degreasing, Then Remove Dust
Use 180 to 220 grit sandpaper for most cabinet surfaces. Sand lightly to scuff the surface and improve primer grip. After sanding, vacuum and wipe down with a tack cloth to pick up all dust particles.
One thing I always tell clients: do not let water or cleaner run into the edges of MDF or particleboard cabinet boxes. Those materials absorb moisture quickly, and the edges swell. High-end cabinets may have veneer, lacquer, PVC wrap, or PET film. Each of those surfaces has a different tolerance for water and strong chemicals. A standard DIY guide will not tell you this, but it matters when you are working with quality cabinetry.
Do You Degrease or Sand Kitchen Cabinets First?
This is one of the most common mistakes in cabinet painting prep. People sand first because it feels productive, but it is the wrong order.
Always degrease before you sand. The correct order is: dust, degrease, rinse or wipe, dry, sand, vacuum, apply tack cloth, then prime. Sanding over grease does not clean the surface—it pushes the oil deeper into the material and clogs your sandpaper.
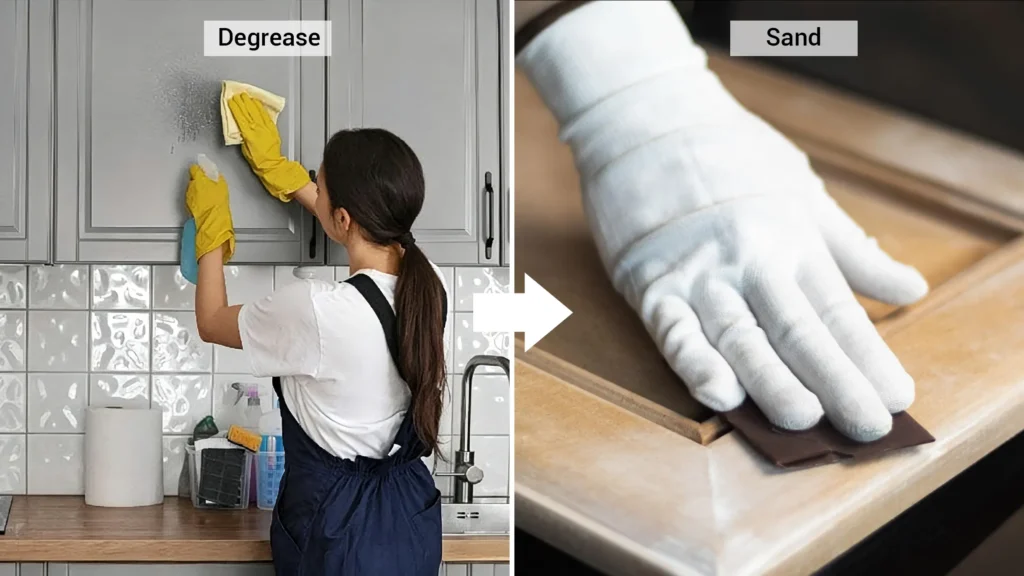
Why the Order Matters
If you sand before degreasing, two things happen. First, your sandpaper picks up the grease and smears it across the surface. Second, the sanding pressure drives the oil into the wood or substrate. You create a bigger problem than the one you started with.
When You Might Need to Degrease Twice
If you start sanding and your sandpaper turns dark, gummy, or clogs up fast, stop. That is a sign that grease is still present. Go back and degrease the area again, let it dry, and then sand again with fresh paper. This is not a failure—it is information. It tells you the first cleaning pass was not enough for that zone.
Sanding is for adhesion, not for cleaning. Its only job is to give the primer more surface texture to grip. When sanding is done over a clean, dry surface, it works exactly as intended. When it is done over contaminated material, it spreads and locks in the problem. I have seen this on project sites where a quick sanding pass was used instead of proper cleaning. The paint looked fine on day one and started failing within a month.
Project Snapshot: Luxury Villa Fit-Out
Pain: A developer’s repainted cabinets peeled within weeks due to hidden grease, threatening a luxury apartment handover schedule.
Solution: Bypassed the risky prep work entirely by switching to our factory-finished, premium custom cabinetry.
Result: Flawless installation achieved in record time, saving weeks of delays and ensuring decades of durability.
How Do You Know Cabinets Are Clean Enough for Primer?
Most guides say “clean and dry your cabinets.” That does not tell you how to know when they are actually ready. Here are five tests I use to check that a surface is genuinely ready for primer.
To know if kitchen cabinets are clean enough for primer, check with a white cloth test, a touch test, a water behavior test, a sandpaper clog test, and a small primer adhesion test in a hidden area. If any of these show grease, wax, or residue, clean again before priming.
Test 1: White Cloth Test
Rub a clean white cloth firmly over the handle areas and the surfaces next to the stove. If the cloth comes back yellow, brown, or slightly sticky, grease is still present. Wipe down those areas again.
Test 2: Touch Test
Run clean fingers across the surface. It should feel dry, matte, and slightly rough from sanding. If it feels slick, waxy, or sticky in any spot, that area is not ready.
Test 3: Water Behavior Test
Spray or drip a small amount of water onto the surface. Clean, properly prepped wood absorbs water or lets it spread evenly in a thin film. If the water beads up tightly into small round drops, there is still oil or wax on the surface.
Test 4: Sandpaper Clog Test
During your sanding step, check your sandpaper every few strokes. Clean, dry wood produces fine white or tan dust. If the paper clogs, turns dark, or feels like it is dragging, grease is still present.
Test 5: Primer Adhesion Test
Before you prime the full cabinet, brush a small amount of bonding primer onto a hidden spot such as the inside of a door edge. Let it dry fully and then press a strip of tape firmly onto it. Pull the tape off fast. If primer lifts with the tape, adhesion is poor and the surface needs more cleaning. This test is recommended by professionals before committing to a full paint job.
These tests take less than ten minutes and give you real information instead of guesswork. The white cloth test and the tape primer test together are the most reliable combination. No guide can tell you exact cabinet is clean—you have to check your specific surface. Grease buildup varies by cooking habits, cabinet age, and how the surface was maintained. Running these checks before you open a can of primer protects the hours of painting work that follow.
Conclusion
Degreasing kitchen cabinets before painting is the step that decides whether your whole project holds. Clean correctly, test the surface, and sand only after the grease is gone. If your cabinets are heavily worn, swollen, or peeling, repainting may not be the best investment—new factory-finished doors or custom cabinets could be the smarter choice. At George Construction Group, I help clients make those calls based on real project experience. Feel free to reach out if you want guidance on your specific cabinet situation.
Stop Repairing. Start Transforming.
A flawless kitchen is just the foundation. From custom cabinetry and premium furniture to architectural lighting, doors, and luxury sanitary ware, we are the one-stop building material provider for world-class villas and high-end apartments. Share your project details below, and let our experts design a space tailored to your exact standards.