Do you need your kitchen or bathroom cabinets to be more attractive? A filler strip could be installed in a pretty convenient and even reasonably inexpensive manner that fills gaps where a whole lot of difference may be made regarding the clean, professional appearance. Replace outdated filler strips or install them for the first time in the following guide; let’s discuss each step on how to install cabinet filler strip.
What is a Cabinet Filler Strip?
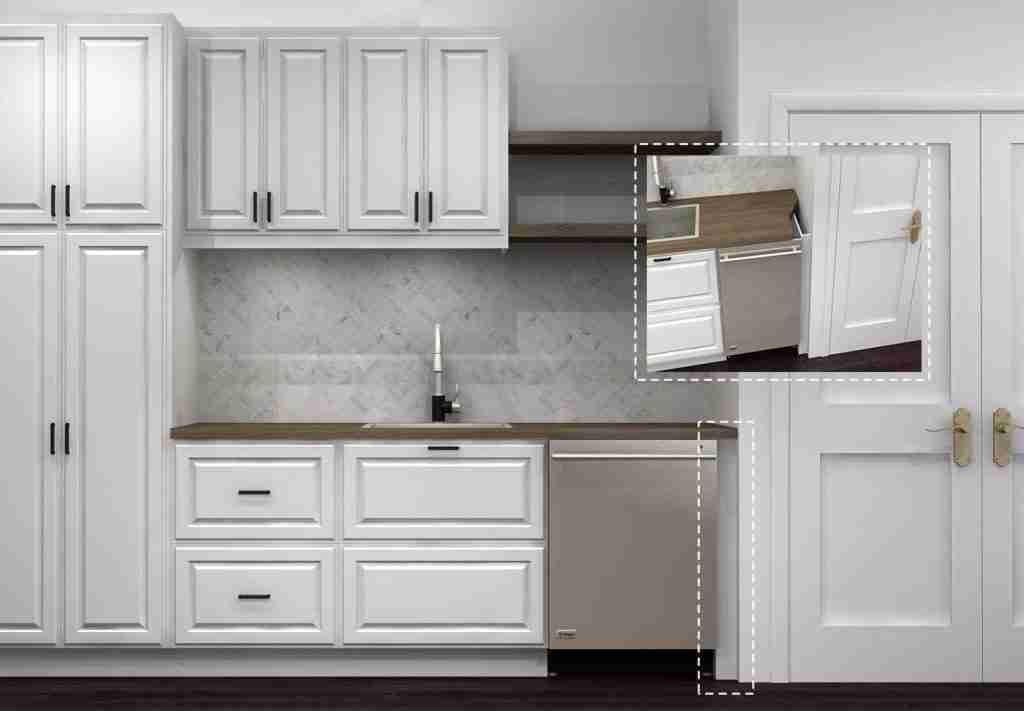
A cabinet filler strip is a thin piece of wood or other material running vertically to fill the spaces between cabinets or between a cabinet and the wall. It’s essential to give a smooth, seamless finish. Gaps will appear eventually in the process due to misalignments and installation of cabinets, or a change in the surrounding space. Installing a filler strip into the cabinet is effortlessly doable to fill these gaps while enhancing the look around the kitchen or bathroom.
Why You Should Install a Cabinet Filler Strip
Installing a cabinet filler strip is not just about looks. There are practical benefits, too. It can help with:
- Improved Aesthetic: It fills unsightly gaps, creating a smooth, uniform appearance.
- Better Cabinet Fit: Filler strips for cabinets fit gracefully against walls or other surfaces.
- Easy and Affordable: The installation process is simple, and the materials are inexpensive.
Now that you know the importance, let’s dive into the detailed steps for cabinet filler strip installation.
Materials and Tools Needed for Cabinet Filler Strip Installation
Before you start, gather the following materials and tools:
- Cabinet filler strips (usually come in 3-4 inch widths)
- Tape measure
- Miter saw, or hand saw
- Wood glue
- Finishing nails or screws
- Drill
- Sandpaper or power sander
- Paint or stain (optional for finishing)
All of them are necessary for getting started. Now let’s move on to the installation procedures.
Step 1: Measure the Gap
Measure the gap to determine the cabinet filler strip location. To measure accurately, you’ll require a tape measure, taking careful note of how wide the gap is. Consider taking the top and bottom measurements because you don’t always get perfectly aligned walls or cabinets.
Step 2: Trim the Filler Strip to Length
Mark the measurements on the filler strip once you have taken them. You can use a curved saw to cut the strip to the proper length. For a polished appearance, cutting should be done at a 90-degree angle. Polish the edges to remove any rough spots after cutting.
Step 3: Dry Fit the Filler Strip
Before securing the strip, place it in the gap to make sure it fits properly. This is your chance to double-check your measurements and adjustments. If everything looks good, remove the strip and get ready for installation.
Step 4: Apply Wood Glue
Put a small amount of wood glue to the cabinet filler strip’s back. This will secure the strip before you screw or nail it into place. When you press the strip into position, the glue will squeeze out, so be careful not to use too much.
Step 5: Position the Filler Strip
Place the cabinet filler strip carefully into the gap, matching its edge with that of the surrounding cabinets or wall. Position it exactly where you want it to be before moving on to the next step.
Step 6: Fasten the Filler Strip
To secure the strip well in its place, you can use finishing nails or screws. You may first drill pilot holes for the screw or nail to avoid splitting the wood. Drive your nails or screws into the strip and the surrounding cabinets. If you are using nails, ensure that they are small enough not to leave some visible marks.
Skip On-Site Trimming
Get Custom Project CabinetsStep 7: Finish the Edges
Once the cabinet filler strip is installed, it’s time to finish the edges. Wood filler should be applied in areas where gaps or nail holes exist. After drying, it should be sanded down to ensure the filler strip has a seamless appearance.
Step 8: Paint or stain the filler strip
Paint or stain the cabinet filler strip to match the color and finish of your cabinets exactly. Apply a very thin coat, and let dry completely. Sometimes you’ll want to apply two coats for coverage. Make sure it’s absolutely dry before assembling the cabinets.
Step 9: Clean Up
It’s time to clean up after installing your cabinet filler strip and waiting for the paint or stain to dry. Clear your cabinets of any excess glue, sandpaper dust, or paint splatters. You want everything to look neat and polished.
Tips for a Perfect Cabinet Filler Strip Installation
- Double-check measurements: Ensure the gap is accurately measured before cutting the filler strip.
- Use a level: Use a level to ensure that the filler strip is perfectly vertical in order to have a clean and professional finish.
- Take your time: In a hurry, mistakes can happen. Be careful when executing each step so as to avoid having the wrong finish.
Project Spotlight: Boutique Resort Bathroom Integration
Pain Point: A resort developer faced severe delays because uneven walls across 80 suites required extensive on-site carpentry to install filler strips, driving up labor costs and resulting in inconsistent finishes.
Solution: George Construction Group stepped in with our one-stop spatial design service. We manufactured custom-sized bathroom vanities and precise, pre-finished filler panels tailored to the exact dimensions of each room.
Result: Zero on-site cutting was required. Installation time was slashed by 40%, ensuring a flawless, luxury aesthetic while significantly reducing the overall project budget.
Troubleshooting Common Problems
If you encounter issues with the installation of your cabinet filler strip, don’t worry! Here are some solutions:
- Uneven gap: If the gap is uneven, you may need to trim the filler strip slightly to fit properly.
- Unstable strip: If the wood glue isn’t holding the strip in place, try stronger glue or fasten it with more screws or nails.
- Obvious seams: If the filler strip and cabinets have obvious seams, smooth them out with wood filler and sand for a perfect finish.
Conclusion
This is an easy and effective way to give your cabinets a lift through a cabinet filler strip. You’ll be able to do this on your own and professionally by just going through the steps I outlined. It’s a great, quick fix for your kitchen or bathroom. Do not forget that perfection is accuracy, and so every step should be done slowly but surely so that you end up with a fantastic finish.
Now that you have known how to attach cabinet filler strip, it’s never too late for your project. With just a couple of materials and basic tools, you’re able to create filler strips that provide that seamless look in your room. If you need professional help or want to explore more home improvement ideas, check out George Construction Group.
Elevate Your Entire Property with One-Stop Solutions
While DIY filler strips can serve as a temporary patch, high-end apartments, luxury villas, and expansive resort projects demand structural perfection. Sourcing cabinets, doors, and sanitary ware from multiple disconnected suppliers is the leading cause of misaligned gaps and endless on-site modifications.
As your premier one-stop building materials partner, George Construction Group eliminates these headaches. We provide comprehensive spatial design services alongside fully customized cabinetry, bathroom fixtures, and whole-house furniture. By integrating your entire supply chain, we guarantee zero awkward gaps, zero mismatched finishes, and a completely streamlined installation process.
Submit your whole-house floor plans or project requirements below to receive a comprehensive design consultation and customized wholesale proposal.