
The dynamic nature of the interior design world means bathrooms are now more than just a basic utility. They are a representation of personal preference and sophistication. A principal fashion for bathrooms in 2025 are floating vanities. They are stylish, space-saving, and inherently modern styles of vanity. George provide an ideal amalgam of luxury and functionality.
If you’re ready to step up your space to a modern look, follow these 6 steps to floating vanity installation for a professional-looking result.
Step-by-Step Guide To Floating Vanity Installation Like A Professional
Floating vanities are a hot trend in bathroom design for their stylish, modern look, and the illusion of a cleaner, larger space overall. One of our most popular models of 2025 is the Floating Vanity in White Oak by George Group. It is a preassembled, high-end product that is equally stylish and convenient.
So how do you properly install a floating vanity? Whether you’re upgrading or remodeling your bathroom completely, here is our complete guide to floating vanity installation in 6 professional steps.
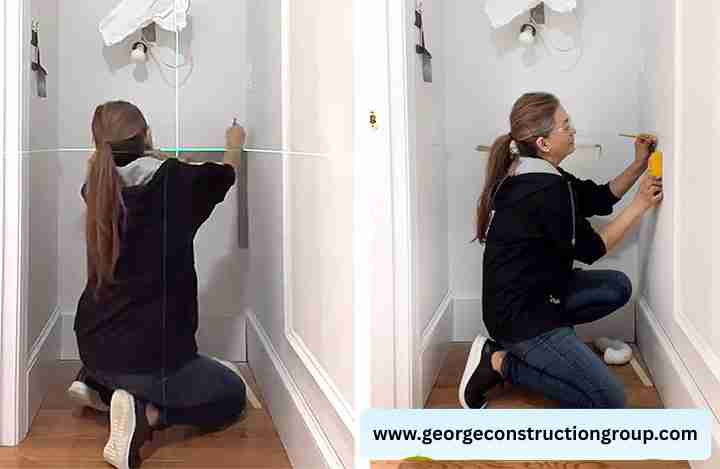
Step 1: Gather All Necessary Tools And Materials
Before you even consider mounting anything, guidance is key. Here’s what you’ll need to finish a success floating arrogance set up:
- George Floating Vanity
- Mounting hardware usually included
- Level ( to make sure your vanity is perfectly horizontal )
- Stud finder ( to locate steady anchoring points )
- Drill and bits ( to drive screws into the wall/studs )
- Wall anchors (if no studs are available )
- Measuring tape & pencil ( for accurate marking )
- Screwdriver & adjustable wrench ( for fittings and adjustments )
- Silicone caulk ( for sealing against moisture )
Having everything laid out before you start ensures a smoother and more efficient floating vanity installation process.
Step 2: Locate Wall Studs And Mark Anchor Points
It is important to secure the floating vanity properly because they hold a decent amount of weight. During this process you will be able to locate the wall studs where the vanity is being installed by using the stud finder. Mark the wall by pencil with a vertical line.
The vanities will attach to the studs, so you want to be exact.
Tip: If the studs don’t line up with the mounting points on the vanity you may have to install a horizontal support board or use heavy duty wall anchors.
Step 3: Measure & Plan Your Vanity Placement
Now that you know where the studs are located, decide on the height and location of your vanity. The standard height for a floating vanity installation is between 30 to 32 inches from the floor to the top surface, but any height can be used depending on personal taste or user height.
Use your level and measuring tape to make a straight, level mark across the wall. You may even need to mark the pinnacle and bottom outlines of where the arrogance will visit to help with the mounting hardware.
Step 4: Install Mounting Hardware Or Bracket
Typically, modern floating vanities will have a mounting frame aka a wall bracket. This is where you will attach the vanity to the studs. Using your pencil marking as a guide, drill pilot holes and attach the mounting bracket to the studs with long screws.
After securing the frame, check the level one more time, to make sure that the vanity is going to hang straight. If you don’t have a stud at the location needed or possible future location, use heavy-duty wall anchors, to reinforce the mounting.
Step 5: Hang And Secure The Vanity
Now you’re going to get to join it all together. With assistance especially for large vanities hold the vanity up and align it with the mounted bracket. When aligned, lower the vanity until it clicks or slides into place over the mounting hardware.
Then you can introduce screws to help secure the vanity to the bracket or directly to the wall depending on how you installed it. Check for level and for alignment earlier than heading over to the plumbing.
Step 6: Connect Plumbing And Apply Finishing Touches
Reattach the water supply and drain lines under the vanity. Use a wrench or set of pliers to tighten all the connections and check for leaks. If you are separately installing a countertop and sink, refer to the manufacturer instructions.
After finishing the plumbing connections, apply silicone caulk around the back edges of the vanity to seal it against the wall to prevent water, and provide a clean look.
Tips For Maintaining Your Floating Vanity
Putting in your floating vanity is only half the battle; caring for it properly is what will keep it looking and functioning beautifully for many years to come. Clean your vanity regularly with mild, non-abrasive cleaning products to avoid damaging any wood or finish.
Even though floating vanities make cleaning the floor easier, avoid letting water pool underneath. Periodically inspect plumbing connections for leaks or drips that could harm your walls or vanity structure.
Good maintenance practices not only value the aesthetic nature of your vanity, they ultimately protect your investment in this modern bathroom update.
Mistakes To Avoid During Floating Vanity Installation

During the floating vanity installation process, there are often simple mistakes made by the inexperienced that can significantly affect the project. A common mistake is not finding the studs properly, leaving the vanity hanging loose. Not using a level properly is another mistake that results in a crooked hanging vanity and can affect the plumbing connections too.
Make sure not to use the wrong wall anchors and avoid rushing the plumbing connections, as this could lead to future leaks. If you take your time, and follow the steps in the order listed below, you will successfully avoid these mistakes and achieve an excellent result.
Case Snapshot: Seamless Luxury Villa Integration
The Pain: A luxury villa developer sourced retail floating vanities, only to find the mounting brackets didn’t align with the existing plumbing and wall studs. Reinforcing the concrete walls would cause massive delays, and the vanity’s wood grain severely clashed with the previously installed interior doors.
The Solution: Utilizing our 3D bathroom space design, we engineered custom-sized floating vanities tailored to the exact stud and plumbing placements. We color-coordinated the materials across the vanities, interior doors, and custom wardrobes, delivering a unified package direct from our factory.
The Result: The developer entirely bypassed structural wall demolitions, saving thousands in labor, and achieved a flawless, cohesive Organic Modern aesthetic across the entire property without managing multiple vendors.
Final Thoughts
Although installing a floating vanity may seem like a monumental task. But with our 6 simple steps, it is completely doable, especially for the more creative DIYers. Floating vanity is a premium option, combining modern styling with the convenience of a pre-assembled unit.
This provides you with added time during your renovation and lessened confusion between assembly instructions and installation. With some consideration and the proper tools, any bathroom can be upgraded to a sleek, usable space.
If you still don’t understand, you can install the floating vanity by watching the video below.
FAQs
How Difficult Is Floating Vanity Installation For A Beginner?
While installing your floating vanity can feel complicated, simply following a straightforward, step by step instruction guide will make it a relatively easy task for anyone including those doing A DIY floating bathroom vanity for the primary time. Just take your time with measurements and locking into the studs, and have the right tools on location.
Can I Do Floating Vanity Installation Without Professional Help?
Yes! Many homeowners complete the installation of a floating vanity as a DIY project. It is important that they have the knowledge on how to hang a floating vanity properly, finding the studs and securing the brackets into the wall for safety and longevity.
What Tools Do I Need For Floating Vanity Installation?
Essential tools are a stud finder, level, drill/screwdriver, measuring tape, wrench and silicone caulk. Having all of these prepared will facilitate a smoother diy floating bathroom vanity project.
Streamline Your Full-House Interior Sourcing
Perfecting your master bathroom is just one piece of your property’s overall transformation. Outfitting a luxury villa or a multi-unit apartment demands strict procurement oversight, not loose retail shopping. Stop paying excessive middleman markups and managing fragmented global vendor lists. From custom bathroom spaces and sanitary ware to full kitchen cabinetry, architectural doors, windows, and designer furniture packages, we construct everything to sync directly with your blueprints.
Submit your architectural floor plans, design criteria, or itemized bill of quantities (BOQ) below to receive a consolidated, factory-direct trade package quote: